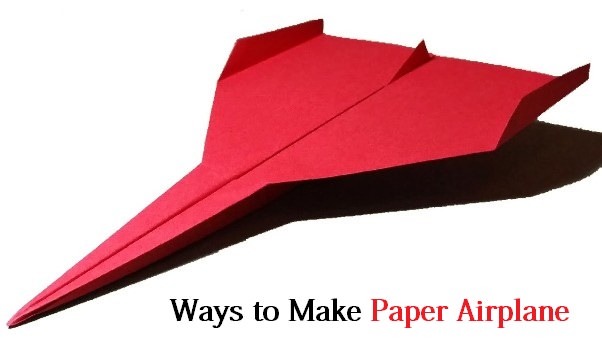
There are many skills father who pass their childhood on how to ride a bike, how to skip a stone and of course how to make a paper airplane. But when it comes to showing their kids on how to fold a piece of paper to make an airplane, they get stumble, so don’t stumble around and hastily construct one from the poor memory of your youth. One that takes a disappointing nosedive as soon as it leaves your fingertips. Teach them the art of making a plane that can truly go the distance. There are many designs which you can try to make.
Methods to Make a Paper Airplane
1.) The Bulldog Dart
This paper airplane is a warm-up of sorts. It is the simplest airplane and require a few folds and flies well. It is not going to win you any contests or style points. But its your kids first time to make a paper airplane this is a good place to start. Follow these steps to make a paper aiplane.
- First, you need to fold the paper in half lengthwise and then unfold it. this step will make a crease which will be simply a guideline for the next folds.
- Fold the top two corners down so they meet the center crease. This is the classic way to start a paper airplane and probably what you first learned in your childhood.
- Then flip the plane over and fold the corners in again to the center crease. You will want the diagonal line coming off the top of the plane to be lined up with the middle.
- When the both fold will be complete then fold the top point down so that the tip meets the bottom of where the previous folds come together.
- Fold the entire plane in half in on itself. Thi will create the snub nose which will give the bulldog dart which is its name.
- Fold the wings down so that you are making a straight line across from the top of the snub nose. Then repeat on the other side.
- The process of making bulldog dart has been finished. This airplane flies better when we throw at lower speeds.
2.) The Harrier Airplane
This is slightly more advanced airplane. You will need to do few more fold in order to finish your work and it flies a bit better than the bulldog dart. This is the perfect airplane which comes in between the category of simple complex recreational paper aircraft.
- Take a paper and fold it in half lengthwise and then unfold again. This center crease is just a guideline for future folds.
- Fold the top corners in so they could meet at the center crease.
- Fold the entire top down so that it resemble an envelope. Make sure to leave the half inch space at the bottom. You don’t want the point to evenly meet the bottom edge.
- Fold the top corner in so they can meet in the middle. There should be a small triangle tail hanging out beneath these folds.
- Then fold this small triangle up which was hanging
- Fold the entire airplane in half and fold it in outwards on itself. You want the smaller triangle to be visible on the bottom edge.
- Fold the wings down so its edges can meet the bottom edge of the airplane. Then repeat on the other side.
- The process of making harrier has been finished. It has cool pointed wings and has great stability because of the triangle on the bottom
3.) The Hammer
This airplane has the perfect balance of complexity and accessibility for the average paper airplane. But it has more folds and also flies the best and the farthest. You need to follow these steps to make a paper airplane.
- Fold the top left corner down so that it meets the right edge of the paper. Then unfold it, this will be your guiding crease.
- Then repeat the same things with the top right corner and unfold it. you should end up with an unfolded sheet of paper with two creases forming an X.
- Fold the top right corner of the paper down so that its edges can meet the crease that goes from top left to bottom left.
- Do the same thing with the left corner. The top left point of the paper should exactly meet the diagonal right edge of the airplane.
- Then fold the plane in half in on itself then unfold it. you will use that middle crease as a guideline.
- After you have unfolded the previous step then fold the top down so that its edges can meet the bottom edge.
- Fold the top corners of the airplane down so that their points can meet at the middle crease.
- Then unfold it, this will be your guide.
- Now take what was the top edge that you previously folded down and fold it back up at the point where it sedges can meet the crease.
- Fold the corners again so that their edge can meet both the edge of the top flap and the crease from two steps ago.
- Both the corner folded in and meet both the top flap and the previously made creases. These are the wings.
- Fold the wings once more, but this time simply fold along the crease that you have already made. After this plane should have straight lines down from the top to the bottom.
- Then fold bold the wings again and straight edges from top to bottom.
- Fold the top down form where it meets the tops of the wings flaps you created in the previous step.
- Then fold the whole thing sin half outward. You want all the paper flaps on the outside of the craft. In this point, the folding can become a little ticky for you due to the thickness of the paper. So take care in making good clean folds.
- Then fold the wings down so that their edges can meet the bottom edge of the plane. This will create a small snub nose. Again this can be a tough fold, so be precise while doing this and take your time if you have to.
- The process of making hammer airplane has been finished.
4.) Stable Airplane
This plane has a lot of stability and can fly very far. It has a tendency to flip upside down during flight. If you will slightly bend two wings up at the rear, so you can get it to do flips and tricks.
- First, you will need to fold the paper in half.
- Then unfold and then fold the top two corner to the center line or airplane.
- Fold the top down of the airplane to make a square.
- Fold the top two corner towards the center about an inch above to the downward facing point, to form a triangle shape on top and a diamond shape on the bottom.
- Then fold the downward facing point up to secure the flaps of the airplane.
- Fold the plane in half away from you and flatten it out.
- Then fold the edges down to create the wide wings. The body or part you hold should be about half an inch tall.
- The process to make a paper airplane has been finished.
5.) The sprinter
This airplane looks like a jet but flies differently than a jet. The wings of this airplane will flap t certain angles, so throw it gently.
- First fold the paper in half diagonally, so that opposite corners can meet.
- Then fold the long edge about half an inch
- Fold the paper in half towards you and then rotate so that the thickest point is facing up.
- Then fold the right side over as far as it can go and make a vertical crease.
- Fold the other side down of the airplane so that sides meet.
- The fold the one outer flap down to create the first wing. So the body will be bout ¾ inch tall.
- Then fold the other flap of the airplane down to complete it.
- The process of making the sprinter airplane has been finished.
6.) Sea Glider
This airplane resembles to seagulls gliding over the ocean. You can experiment and find your own to bend the wings.
- Fold the paper to make a paper airplane diagonally.
- Then cut off the extra piece of paper at the bottom
- Then fold the closed edge over about one and a half inch
- Fold the plane in half.
- Then fold one of the top edges of the airplane
- Repeat the other side
- Then fold out one side to create the one wing.
- Finally, fold out the other sides to finalize the plane.
- Now your airplane is ready to fly
7.) Hunting flight
This straight-shooting plane has a heavy nose, which helps it to go for. Thow this airplane as hard as you can and watch how far it can go.
- Fold the paper to make a paper airplane in half.
- Then fold the top edge of the paper down about 2 inches.
- Then again fold the top edge down to double up the thick part and the process more time.
- Fold the top corners away from you to the back center line
- Then fold the plane in half
- Fold both sides down to create the wings and bend the edges up for the speed. The body should be about a half inch.
8.) Heavy Nosed plane
This plane to basic dart. The additional fold of this airplane gives ti more weight at the nose and allow it to go a far distance.
- First, fold the paper in half
- Then fold the top corners to the center line
- After that fold the upper sides of the center line.
- Fold the peak of the airplane to the bottom edge of the paper.
- Now fold the peak back up about 2 ½ inches past the top edge
- Then fold the peak back down to the edge of the previous crease
- Fold the entire plane in half towards you.
- Finally, both fold both the sides down to create the wings of the airplane.
9.) Royal Wings
You will need to make the cut on this airplane to make like much like real planes. This plane has also inspired ideas for new plane designs.
- Fold the sheet of paper in half.
- Then fold down the top right corner of the paper to the end of the center line
- Open and then repeat with the other side of the paper to get the creases shown
- Then fold the center out to get the diamond shape.
- After that fold the front flaps of the airplane up.
- Now fold the flaps behind the top edge of the airplane.
- Then fold the entire top half of the plane away from you. The peak should reach the end of the backside of the airplane
- Fold the plane in half towards you.
- Fold out both sides of the paper to create the wings of an airplane. The body should be a half an inch.
- Then bends the ends of the wings up and then cut it into two small slits at the tail of each wing.
10.) Gliding plane
This plane glides for long distance and perfects to throw off high area.Its odd folds are made to withstand the wind.
- Fold the paper in half to make a paper airplane
- Bring the right corner down of the paper to meet the bottom center of the left rectangle.
- Then open the sheet and repeat with the other corner to get the creases to guide
- Open the sheet back up and fold the center in. now fold the outer flaps to the center line.
- Then fold the center piece.
- Take the outer points and fold them in twice so they get tucked in.
- Then fold the plane in half towards you.
- Finally, you need to fold the edges to complete the airplane.
- Now your plane is ready to fly.
Read more to know:
