Beauty blender is amazing for the founder application. They are easy to use and kind of fun to use and people love them, they actually do a great job with makeup application. The issue is that most of the makeup sponges are disposable and mostly people think about cleaning them. But if you are reusing makeup sponges, then its better to clean them. All know that dirty makeup tools lead to breakout and uneven application, so cleaning is really important. The beauty blender needs to be clean frequently and properly. The important thing to keep in mind that these need to be replaced every few months, it also depends on how frequently you use them. They can be ruined if the wrong product is used. So you can find steps to clean beauty blender in this article.
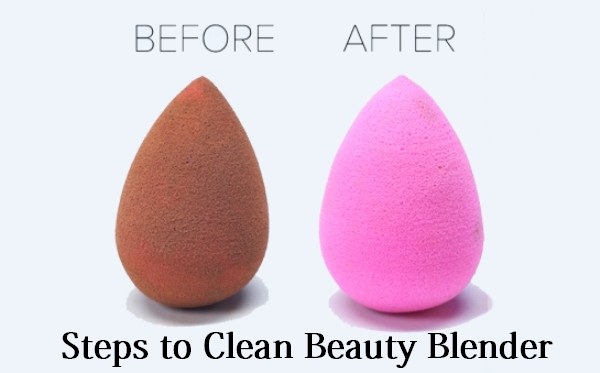
Steps to Clean Beauty Blender:
1.) Soap Water to Clean Beauty Blender
First, you will need to prepare a dish of warm soapy water. You need to fill a small dish with warm water, then put some hand soap or shampoo in it. Mix lightly until suds form on the surface of the water. Don’t use dish soap as it can irritate your skin when you need to use the sponge later. Use baby shampoo and gentle formula organic shampoo.
- Then put the sponge into the dish of soapy water. Squeeze it three to four times with your hand, then let it soak for about 30 minutes.
- As you will soak the sponge the water will likely to begin to change color. When the water will change its color that means it draws the foundation and other cosmetics out of the sponge.
- The sponge should also expand to its full size as it will soak in the soapy water.
2.) Massage Cleanser to Clean Beauty Blender
Gently rub the solid blender cleanser or an equivalent soap directly into the most area of the sponge which is heavily spoiled. You should use a gentle cleaner to avoid damaging the soap. If you prefer solid soap, castile soap is the best option. If you are choosing a liquid soap, consider using moisturizing baby shampoo or an organic shampoo with a gentle formula.
- Spend about 2 to 3 patient minutes massaging the cleanser into the sponge. Only use your fingertips, don’t use a scrubbing brush or other abrasive tool to clean beauty blender as it could damage the sponge.
- Then rinse the sponge under warm running water until all the cleanser washes out. Any other additional makeup sitting near the surface of the sponge will get rinsed out during this step.
- You will need to gently squeeze the sponge under the running water to help to remove the soaps and makeup.
3.) Dry Using Paper Towel
Wring out excess water by gently squeezing the sponge with your hand, then roll the sponge in clean, dry paper towels to absorb water still left inside.
If the sponge is still damp after you Squeeze out the water with paper towels, let it sit in a dry location to continue air drying. Wait until the sponge is completely dry using it as an applicator.
4.) Deep Clean to Clean Beauty Blender
As a general rule, you will only need to perform a deep cleaning on your blender sponge if the sponge still looks dirty even after following the cleaning process.
- This is more likely to happen when you use your blender sponge multiple times per day or if in case you forget to clean it one or more weeks.
- You will know when your blender needs deep cleaning. If the rinse water at the end of your basic cleaning routine still seems to dirty, or if there are visible stains on the sponge after it dries, try deep cleaning it.
5.) Apply Cleanser to Clean Beauty Blender
First, you will need to hold the sponge under warm, running water for about 50 to 60 seconds, or until it absorbs enough water to expand to its full size. Or you can put the sponge in a bowl of warm water for about 5 to 10 minutes.
- In this process you don’t need to use soapy water to clean beauty blender, nor do you need to wait for the water to change the color before continuing to the next step.
- Then dab solid or liquid cleanser directly onto the heavily solid areas of the sponge. Or you only need to use a gentle cleanser on your sponge. Specially formulated blender cleanser will work well. But if you prefer another option you can go for solid castile soap, liquid baby shampoo or sensitive formula will also work well.
6.) Rub the Sponge Against your Palm
Rub the coated portion of the sponge against the center of your palm and work the sponge in the circular motion to clean beauty blender. Continue rubbing the sponge for about 30 seconds.
- You should scrub it more vigorous than the scrubbing used during your basic cleaning routine. But it should be gentle enough to avoid distorting the shape of the sponge or tearing the sponge.
- As you scrub the cosmetic present deeper inside the sponge will be drawn out through the surface. You will notice the suds on your palm becoming tinted with the color of your foundation.
7.) Rinse While Continuing to Scrub
Rinse the sponge under warm running water while rubbing it with your palm in the circular motion to clean beauty blender. Keep rinsing the sponge until all the suds are gone.
- You could need to rinse the sponge for several minutes before you clean out all the soap. It is important that you rinse out all the soap.
- You can test the sponge that all makeup are gone. Rinse the sponge under running water until the suds disappear. Make sure that water you will squeeze out should be clear and clean.
- Apply more cleanser to the sponge and rub it against your palm. If you see the resulting lather is white then understood that sponge is now clean.
- Then you need to dry the sponge, gently wring out most the excess moisture by squeezing the sponge. Then roll the sponge over clean and dry paper towels to dry it.
- The sponge will probably still be damp after this, so set it aside in a dry place and allow it to air dry. Only use the blender sponge as an applicator once it is completely dry.
8.) Sterilize to Clean Beauty Blender
Even if you have clean beauty blender, you should still sterilize it using heat. Do this at least once a month. This is mainly important if you use your beauty blender sponge on a daily basis. But the only way to kill the bacteria lying deeper in the sponge is by killing it with a short burst of intense heat.
- You should sterilize the sponge more than once a month if you notice the bacteria are building up more rapidly. Signs of bacteria building include uncharacteristic acne breakouts and a foul odor coming from within the sponge.
- Remember that you will still need to perform basic cleaning procedure after sterilizing the sponge because sterilization will only kill the bacteria, it will not remove any cosmetic stains or foundation.
9.) Microwave to Clean Beauty Blender
Fill a microwave safe bowl about 1 inch of water. Lay the sponge down in the center of the water puddle.
- You should sit the blender sponge in water. Make sure not to microwave a fully dry sponge since doing so could damage the material or cause the sponge to catch fire.
- Then place the uncovered bowl in your microwave and run the appliance at full power for about 30 seconds.
- Keep an eye on the blender sponge as you microwave it. but don’t be alarmed if it slightly expands or if trails of smoke develop. Stop the microwave immediately if you finds heavy smoke starts of form or balloons up past its full size.
10.) Let it Rest
Wait for about 1 to 2 minutes before removing the bowl from the microwave and remove the sponge from the water.
- The sponge will likely to be very hot once the microwave cycle ends and the waiting period is primarily for your own protection.
- Then gently roll the sponge in a clean and dry towels. Let it sit out at room temperature until it feels completely dry.
if you want to perform some basic cleaning routine on the sponge after sterilizing it with heat you can do it immediately after pulling it out of the microwave. You don’t need to dry the sponge first for this process. - But wait for the blender sponge is completely dry before using it as an applicator.
You can also have a look at following articles:


